Although my personal laptop isn’t getting much attention from me because I’ve spent most of my time on my work laptop (a MacBook Pro) and my Android tablet (Samsung Galaxy Tab S5e), I’ve decided to take good care of its software over last weekend by wiping the SSD clean and installing a fresh OpenSUSE on it. As an old habit, I’m sharing some notes during the installation and later setup. This is, however, the first blog post written in English here (not counting the old ones on no-long-working en.librehat.com).
Installation
Before anything, make sure you’ve backed up all your important documents and other data. If you trust big tech companies, why not already using OneDrive or Google Drive to keep all your files in the cloud?
- First of all, download the DVD image from https://software.opensuse.org/distributions/leap and follow the official easy steps to create a bootable USB stick
- Restart the computer and boot from the USB stick
- Follow the GUI installer instructions. The main thing I intervened was to partition the hard disk myself. I’ve allocated about 80G for the root partition (
/) in EXT4, and all the rest for the home (/home) in XFS, excluding the necessary/bootand swap partitions
The decision to use EXT4 over Btrfs is the stability in personal experiences and online rumors. EXT4 has been maintained for many years and is in a near-bullet-proof state. Meanwhile, I’ve experience weird annoyances with Btrfs, including desktop freezing and all of a sudden longer-than-expected booting process. A lot of the annoyances were found potentially related to Btrfs, according to my own non-scientific online research.
Once the installation is done, reboot the PC and remove the USB stick.
Post-Installation Setup
Repositories and RPMs
You may almost certainly want to add some additional repositories. The easiest way is to use YaST -> Software Repositories. You can find some of them on this OpenSUSE page. I also added devel:nodejs so that I can install the latest LTS version of node.js (the distribution shipped with only nodejs-10).
Graphics
Most Intel and AMD cards are supported very well by open-source drivers. In my case, it’s just a poor Intel integrated graphics card, but it works amazingly out of the box. There are still some tricks that one can follow, for example, this Arch Wiki has very detailed instructions.
I only enabled GuC and HuC for my Intel graphics card and haven’t noticed any regression yet so that should be something you may want to do as well if you’re on Intel. You can do that by Yast -> Boot Loader -> Kernel Parameters, add i915.enable_guc=2 and reboot. Don’t do this if you’re using a very old Intel chipset (pre-SandyBridge).
Fonts Configuration
These days you probably want to get noto fonts which are packaged and distributed by most Linux distributions: sudo zypper in noto-sans-fonts noto-sans-cjk-fonts noto-serif-fonts noto-serif-jp-fonts noto-serif-sc-fonts noto-serif-tc-fonts noto-serif-kr-fonts. In addition, though, you may want to grab those fonts from Microsoft Windows because some websites just assume those fonts are available on your OS. Lastly, for fellow programmers, I highly recommend you to also install Fira Code.
After we get these fonts installed, we can update the fonts settings in System Settings. This might not be enough though, because the fallback order might be wrong and some random fonts may be picked up to display non-Latin characters, to solve that, edit ~/.config/fontconfig/fonts.conf (create if not exist, reference here):
<?xml version="1.0"?>
<!DOCTYPE fontconfig SYSTEM "fonts.dtd">
<fontconfig>
  <alias>
    <family>serif</family>
    <prefer>
      <family>Noto Serif</family>
      <family>Noto Serif SC</family>
      <family>Noto Serif TC</family>
    </prefer>
  </alias>
  <alias>
    <family>sans-serif</family>
    <prefer>
      <family>Noto Sans</family>
      <family>Noto Sans SC</family>
      <family>Noto Sans TC</family>
    </prefer>
  </alias>
  <alias>
    <family>monospace</family>
    <prefer>
      <family>Fira Code</family>
    </prefer>
  </alias>
</fontconfig>
Web Browser
As much as I love freedom and privacy, Google Chrome/Chromium still outperforms Mozilla Firefox on Linux today. Sadly but for the sake of usability, I’ve removed firefox and installed chromium.
Change the theme to use system GTK+ theme for better visual integration (even for KDE). For KDE Plasma 5 users, load this extension to make the scroll bar shown in breeze style.
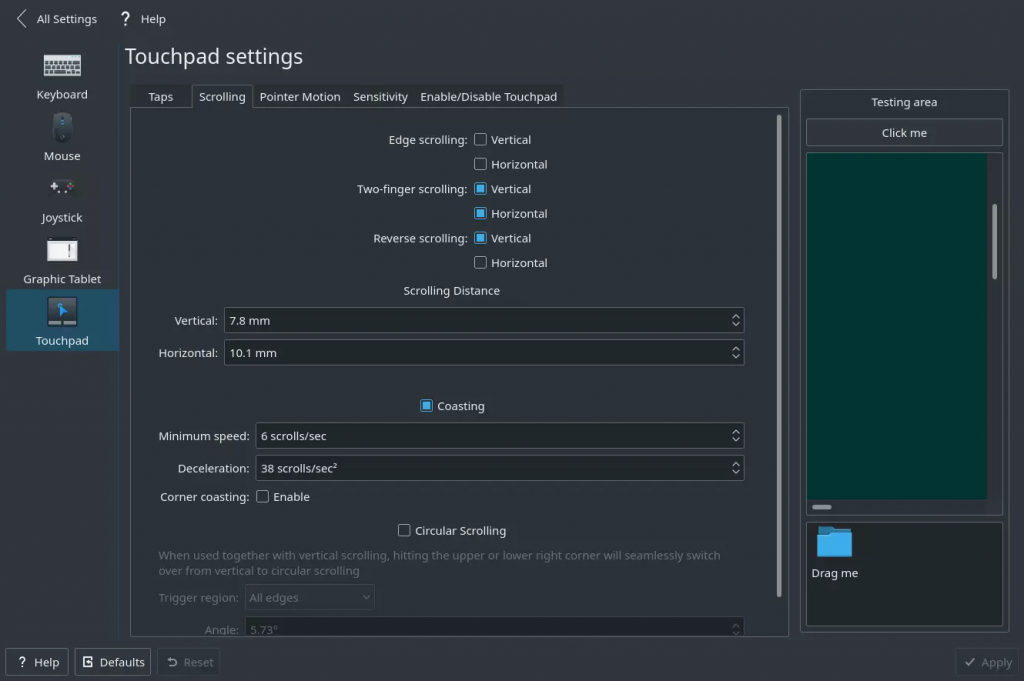
Touchpad Settings
This is a tricky one, the numbers below are purely subjective and particular to my laptop (Lenovo YOGA-700 14″). With the default settings, you probably find that your touchpad feels like a $5 cheap toy, especially when compared to the ones you usually experience on a high-end Windows laptop or MacBook.
Open KDE System Settings -> Input Devices -> Touchpad, you would want to change Scrolling vertical and horizontal distances until you find them satisfying. You also want to test that in an application (I recommend using Chromium since you’ll spend most of the scrolling here probably). The test area wasn’t working for me. In my own case, the best scrolling distances for vertical and horizontal are 7.8mm and 10.1mm respectively. Coasting is highly recommended (it’s called kinetic scrolling in some software).
Pointer Motion should also be updated (it was way too sensitive in my case) to make the pointer move in a sane manner.
This post will be updated in the coming weeks if I remember more things to add.